Instructions for Uploading Premium Yoast Where Regular Yoast Is Already Installed
For the health and safety of your site, nosotros recommend creating regular backups of your site and database. This is especially important earlier installing, updating or removing plugins. Learn more than well-nigh the benefits of regular backups hither.
- How to update a Yoast plugin using the Updates Dashboard
- How to update a Yoast plugin using the Plugins Overview
- Remove and re-install
- How to manually update a Yoast plugin using FTP
- Automatic updates in WordPress 5.5
Did you lot know that we have a Premium plugin as well? Yoast SEO Premium can help you with everything related to SEO! For example, its advanced text analysis helps you write naturally flowing texts. The internal linking tool and the content filters make your posts like shooting fish in a barrel to find. 404 errors become a thing of the past with the redirect director. And, the social previews give yous full control of how your posts appear on social media. Become it now!
How to update a Yoast plugin using the Updates Dashboard
Updating via the updates admin is the quickest mode to update all plugins and themes in just a few clicks. We recommending backing upwards your site before running updates.
- Log in to your WordPress website.
When you're logged in, you volition exist in your 'Dashboard'.
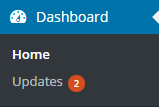
- Click on ' Updates'
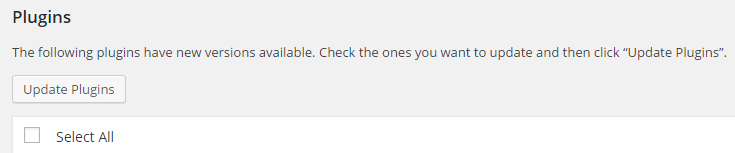
- Add together a checkmark for each available Yoast plugin update.
On this page, you volition encounter all of the items that your site has identified as needing updated. Curlicue down to the Plugins section and put a checkmark next to the Yoast plugins.
- Click 'Update Plugins'
How to update a Yoast plugin using the Plugins Overview
Updating via the plugin list is a safety and easy culling to updating via the updates dashboard. We recommending bankroll up your site before running updates.
- Log in to your WordPress website.
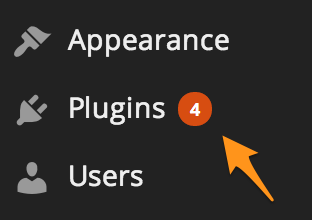
When you lot're logged in, y'all will be in your 'Dashboard'. - Click on 'Plugins'.
On the left-hand side, you volition see a menu. In that menu, y'all may meet a number next to 'Plugins' in the menu. This indicates the number of updates that are available for your plugins. If yous see a number, click on 'Plugins'.
- Click 'Update now' for the Yoast plugin.
Review the plugin listing and look for the plugin update notification. Click 'update now' to begin the update process.

- Repeat for every plugin with an update notification.
Remove and re-install
- Log in to your WordPress website.
When yous're logged in, yous volition be in your 'Dashboard'. - Click on 'Plugins'.
On the left-mitt side, you will run across a menu. In that menu, you may encounter a number next to 'Plugins' in the card. This indicates the number of updates that are available for your plugins. If you see a number, click on 'Plugins'.
- Click 'Deactivate' for the Yoast plugin.
Review the plugin list and expect for the plugin you want to deactivate. Click 'Deactivate'.

- Click 'Delete' for the Yoast plugin.
Click the 'Delete' push button to remove the plugin for your WordPress installation. Please know that all your settings volition remain intact and will exist restored after you install the plugin in one case over again.
 - Download the plugin cipher to your computer.
You can discover the Premium versions of our plugin in your MyYoast account. Download the plugin files and save them to your figurer. - Click 'Add New'
The 'Plugins' settings volition aggrandize providing you additional options. Click on 'Add New'. - Click the 'Upload Plugin' button near the pinnacle of the screen.

- Click the 'Cull File' push.
Scan to the folder where you saved the plugin download and select the plugin goose egg file.
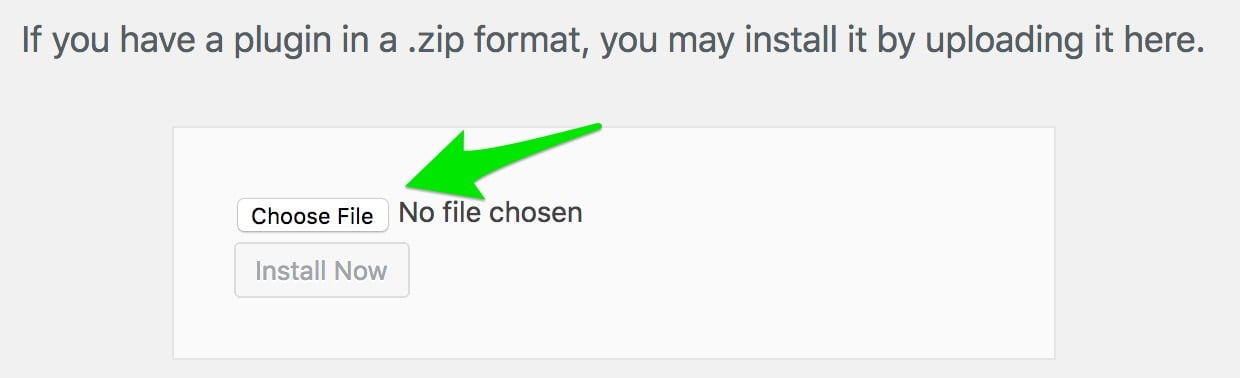
- Click 'Install Now'.
This may take a while and then be patient. - Click 'Actuate Plugin'
You will at present take the latest version of your Yoast plugin installed with the verbal settings it previously had.
How to manually update a Yoast plugin using FTP
If your WordPress admin doesn't prove the bachelor update (which might happen due to a failure to communicate with a WordPress server) or if the automatic update doesn't work, you lot may want to manually update your costless plugin by using File Transfer Protocol (FTP) or preferably the secure version, Secure File Transfer Protocol (SFTP). If you are not certain how to do this your host provider may be able to help.
To manually update the plugin, you must accept:
- Your FTP or SFTP login information
If you exercise non have this information, please contact your host provider and obtain your host (or IP address), Username, Countersign, and Port number. - An FTP or SFTP programme
Nosotros employ and recommend FileZilla but any FTP or SFTP program should work, including file managers provided by most web hosts.
Now that you accept the required stuff, a manual update consists of downloading, unzipping and uploading the plugin files. We recommending backing upwards your site before running updates.
- Download the plugin zip to your computer.
Get to the website of the gratis plugin, for example Yoast SEO. Download the plugin files and salvage them to your figurer. - Excerpt the downloaded .zip file.
- Upload the extracted files to your plugins folder
Upload the extracted plugin binder to thewp-content/pluginsbinder in your WordPress directory online. The name of the extracted plugin folder should be equal to the name of the existing plugin-binder online.
Notation: Make sure you overwrite the existing plugin-files. Doing and so is not expected to outcome in the loss of Yoast data or settings on the site.
Some other option is to remove and re-install the Yoast plugin. you can practise this by following these steps.
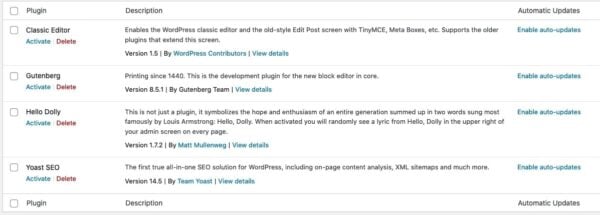
Automatic updates in WordPress 5.5
WordPress 5.5 offers the possibility to enable auto-updates for your plugins. Please note that if this is something you want to use, y'all have to enable it yourself for each plugin. Become to your admin dashboard, click on "Plugins" in your card, and click "Enable auto-updates" next to every plugin you desire to have automatically updated.
If you lot take Yoast SEO automatically updated, you will receive a notification on your dashboard. The notification volition contain a short summary virtually the update and a link to the release postal service on yoast.com.
gonzalezableatifes.blogspot.com
Source: https://yoast.com/help/how-can-i-update-my-free-plugin/
0 Response to "Instructions for Uploading Premium Yoast Where Regular Yoast Is Already Installed"
Post a Comment